Using the Gradient Tool
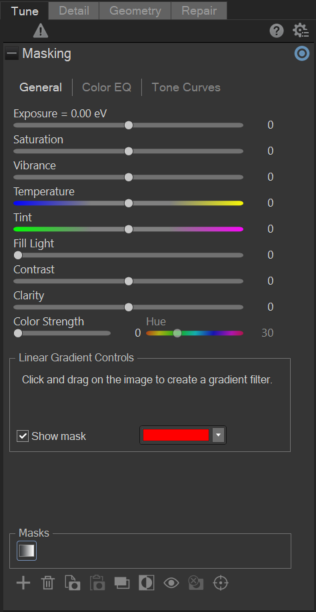
While the Develop tools allow you to make a variety of adjustments to your photos, sometimes you want these effects to gradually progress across your photo. You can adjust the Exposure, Saturation, Vibrance, Temperature, Tint, Fill Light, Contrast, Clarity, and Color Strength, as well as Color EQ, Tone Curves, and Sharpness in one or a series of gradients over your photo. For example, instead of applying exposure adjustments across an entire photo, you may want them to be stronger in some areas and weaker or absent from others.
Gradient Tool
The Gradient tool button displays at the top of Tune and Detail tab.
To Use the Gradient Tool:
- In Develop mode, on the Tune or Detail tab, click the Gradient button
 at the top of the pane to open the control panel and enter gradient mode. Or, toggle the Gradient panel open and closed with the G key.
 - Specify the gradient settings in the panel as described in the table below.
- Position the guides on your photo. Inside the guide boxes, the gradient is transitioning. On either side of the boxes, the effect being applied by the Gradient tool is at full strength or not applied at all. To make this clearer, check the Show gradient mask checkbox. Move the boxes to define where the effect will begin or end. Hold down the Shift key while positioning the effect to lock to the nearest 45° angle, for straightness.
- Adjust the sliders to get the effect you want.
- Press Apply or Done.
To apply another gradient, (up to eight are available), select the next gradient in the sequence at the bottom of the panel. The box above the gradient will become checked. The checkmarks represent the activated gradients, while the selected gradient icon (highlighted in blue) represents the currently enabled gradient. You can return to any of the gradients at any given time by selecting its respective gradient icon. A blue gradient represents a gradient that has been used. You can deactivate or re-activate any gradient by unchecking or rechecking its respective checkbox.
Gradient Tool Options
|
Invert gradient |
|
|
Show mask |
When this option is checked, your gradient mask will be displayed in the color shown. Alternatively, hold down the S key to see the mask on the image. Click the drop-down arrow to select another display color. |

Using the Gradient Tool on the Detail Tab
|
Sharpness |
Move the Sharpness slider to the right to sharpen the area affected by the gradient, or move the slider to the left to blur the area affected by the gradient. |
To exit Gradient mode, toggle the back button. ![]()